Stage 5 - The Spine Box
In this stage you will be assembling The Spine Box.
Step 1 - Attach the Motor To The Axle
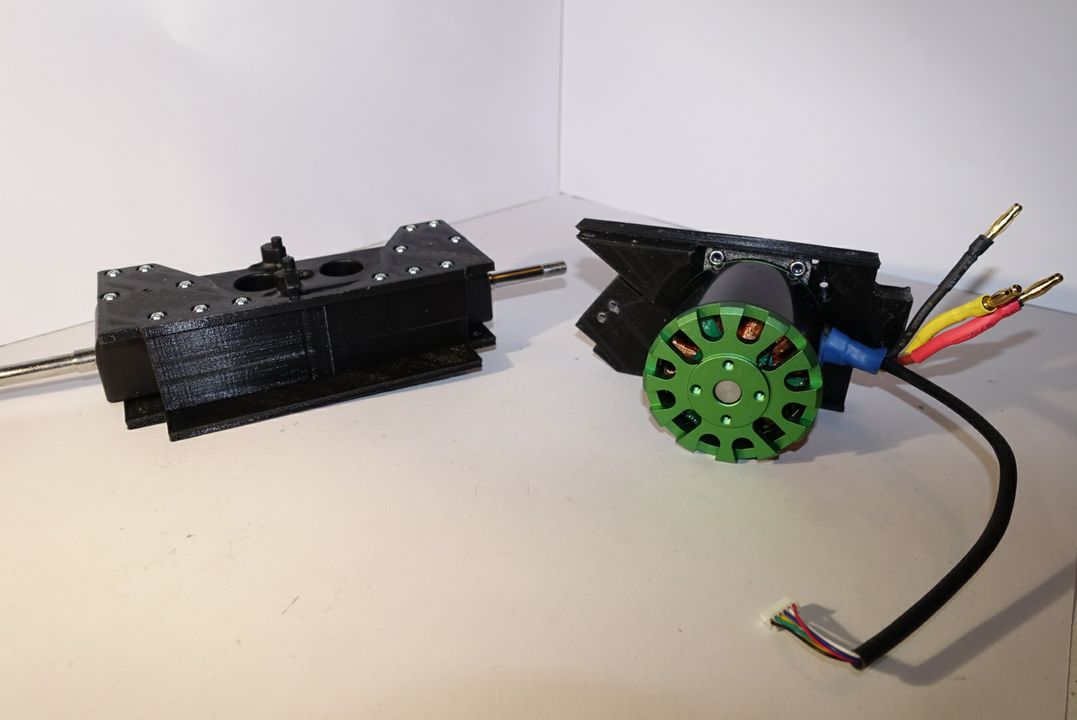
Picture 1.1
Prepare the bracket that has the motor on it and the axle you assembled in Stage 1. Align the components as shown in picture 1.1.
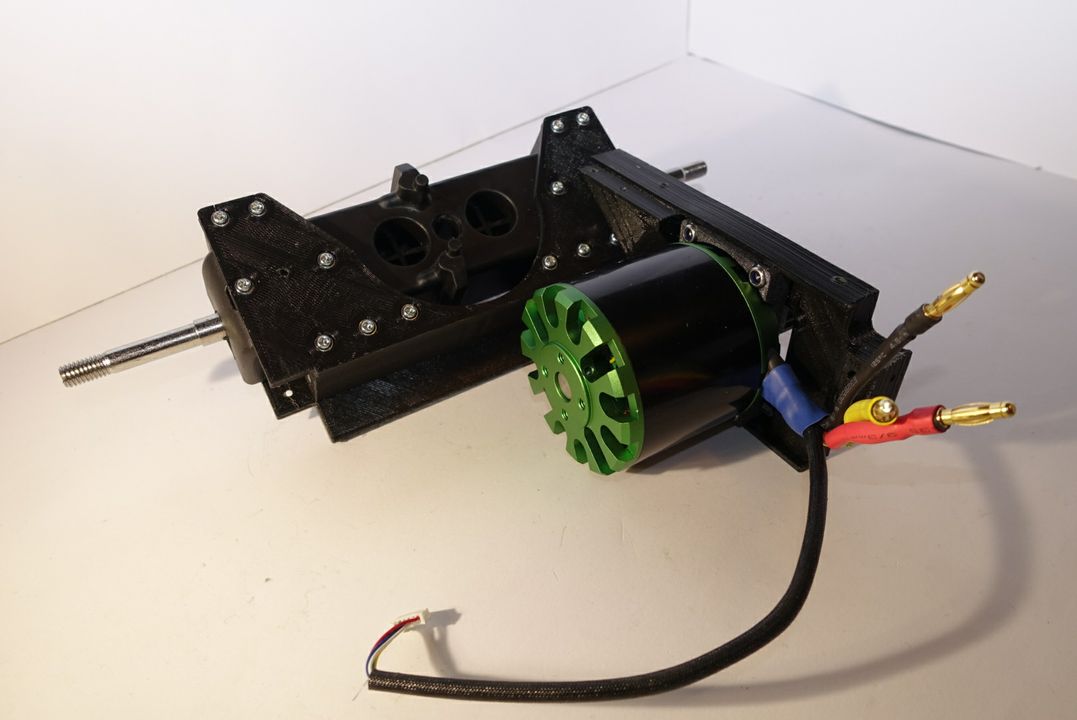
Picture 1.2
Slide the bracket into the axle as shown in picture 1.2.
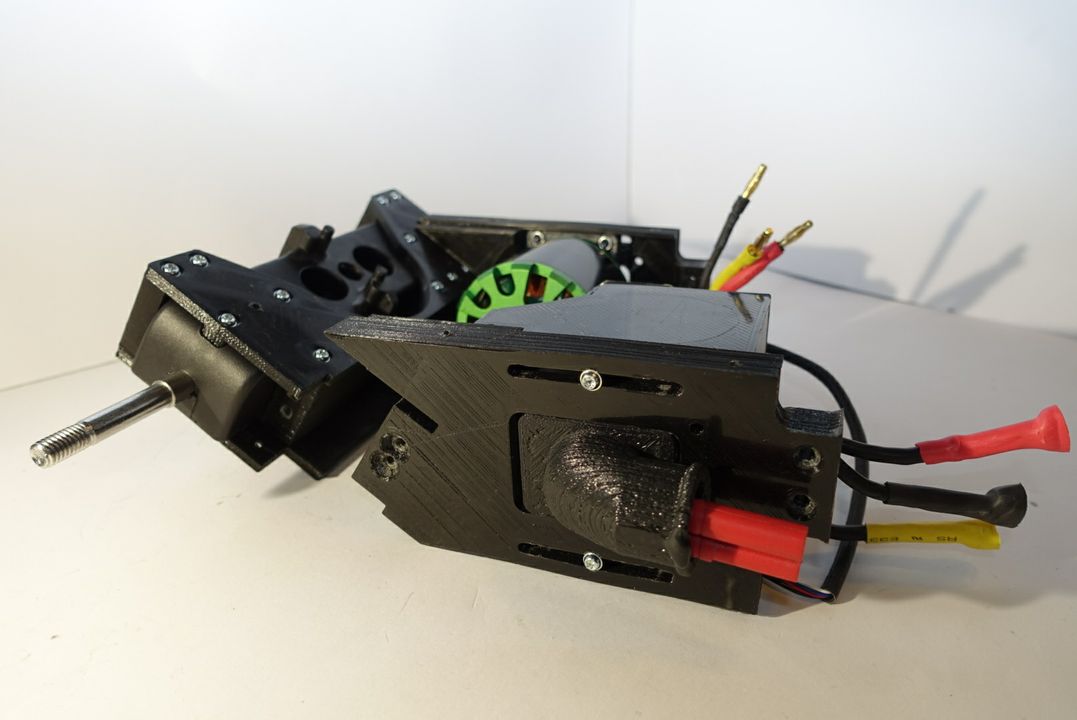
Picture 1.3
Now prepare the second bracket and align it as shown in picture 1.4.
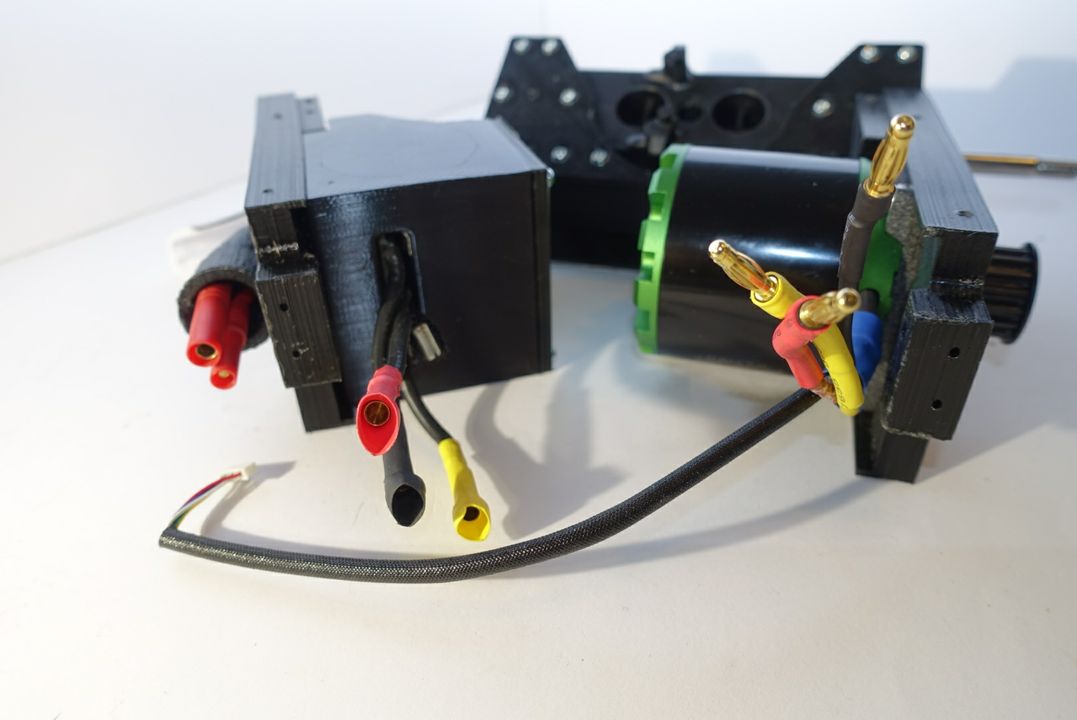
Picture 1.4
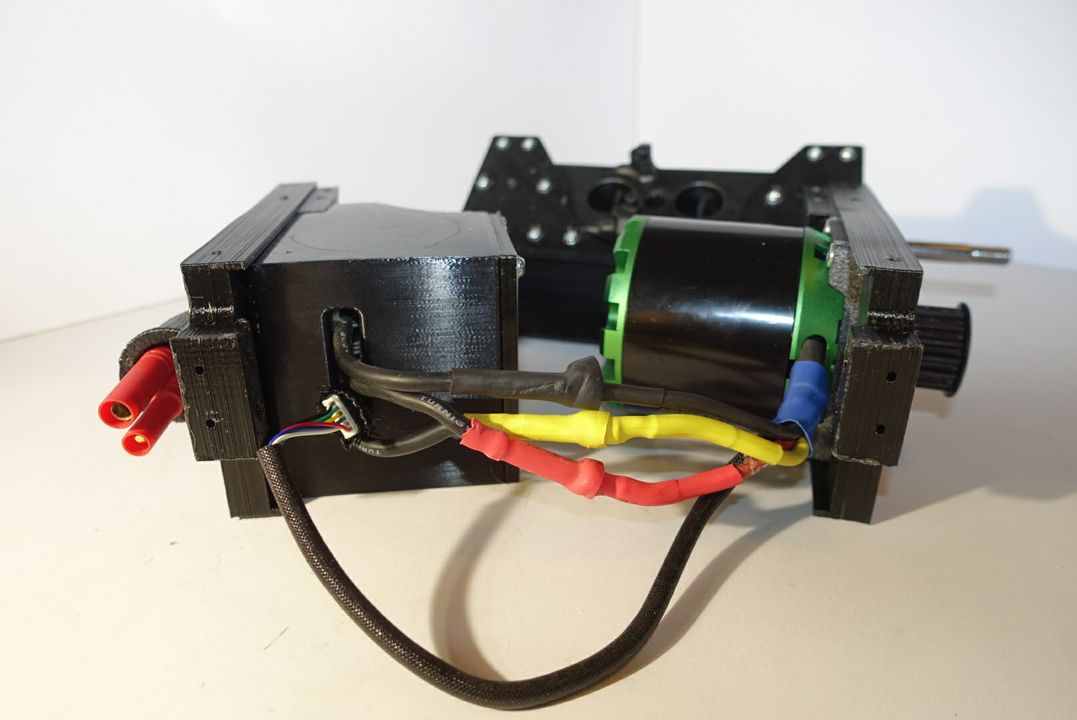
Picture 1.5
Connect the color coded cables and the motor sensor cables as shown in pictures 1.4 - 1.5.
Step 2 - Attach the Battery Box
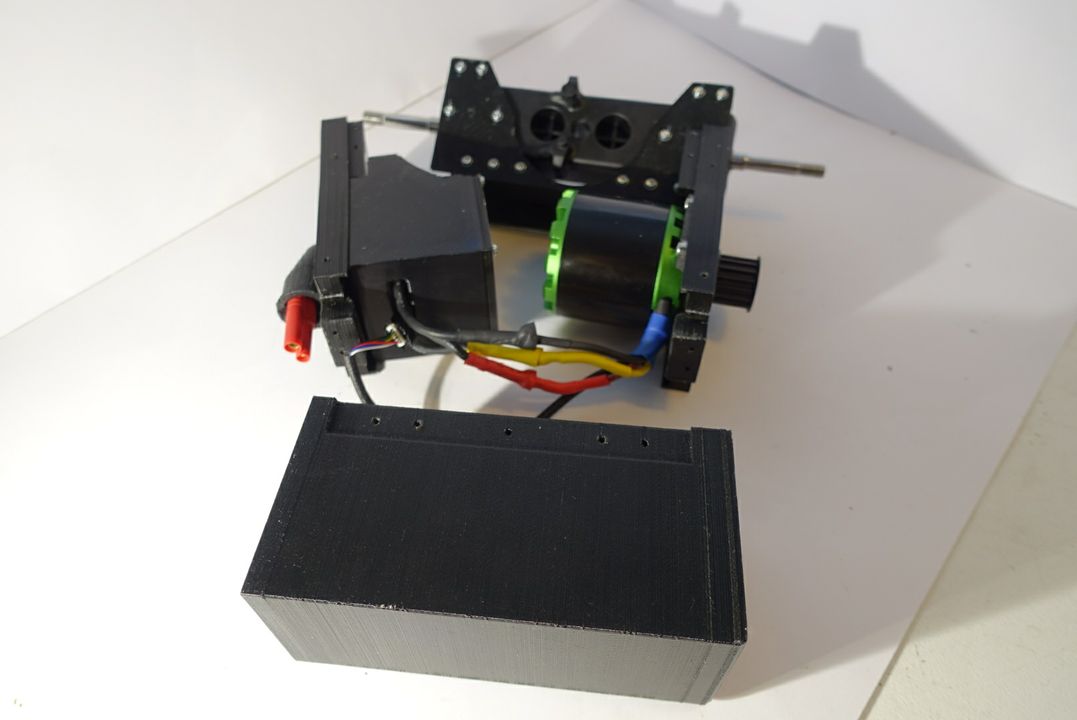
Picture 2.1
Align the battery box and the brackets as show in picture 2.1
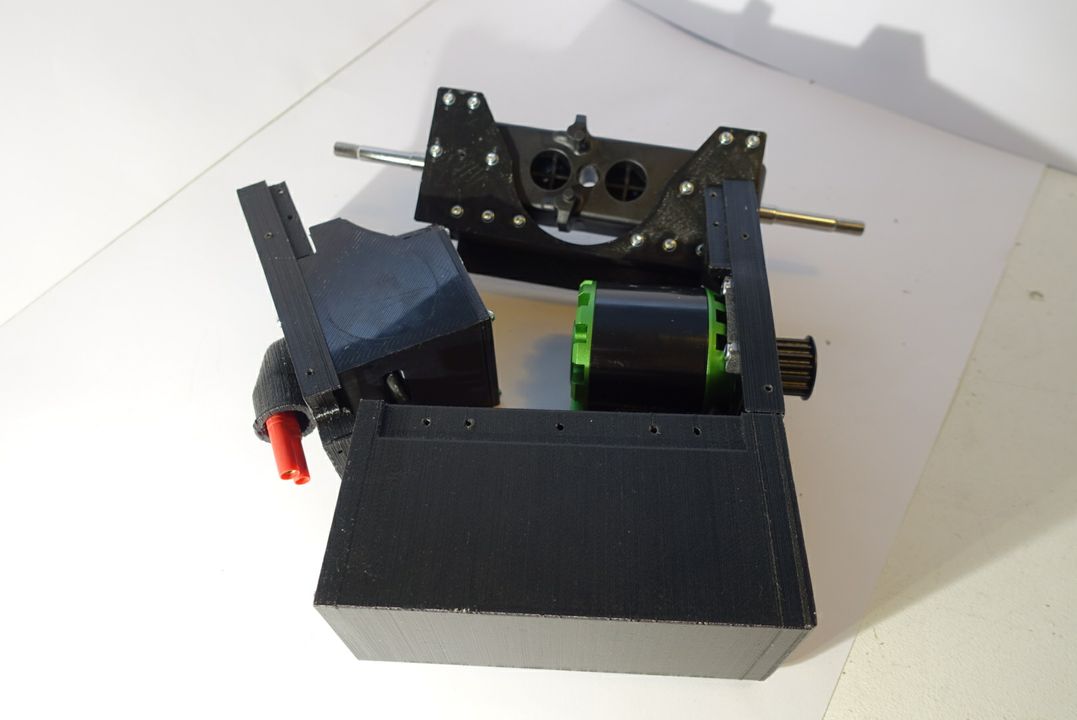
Picture 2.2
Now mount the bracket with the motor onto the battery box as shown in picture 2.2.
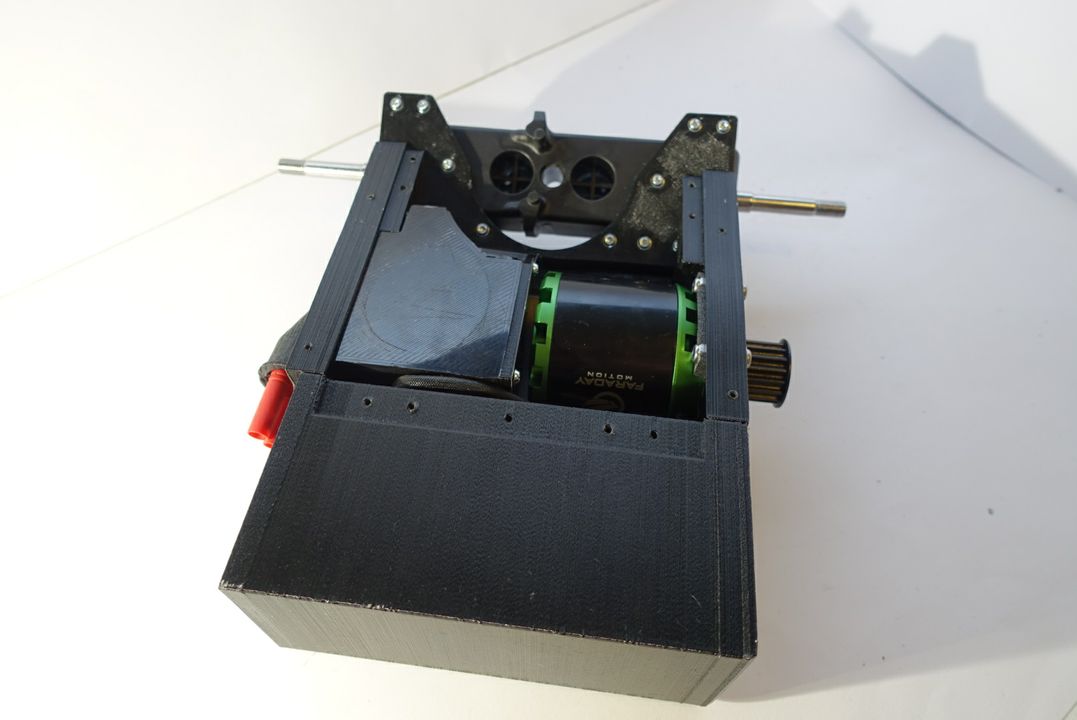
Picture 2.2
Proceed with sliding the bracket with the electronics onto the construction so that you have a result as shown in picture 2.2.
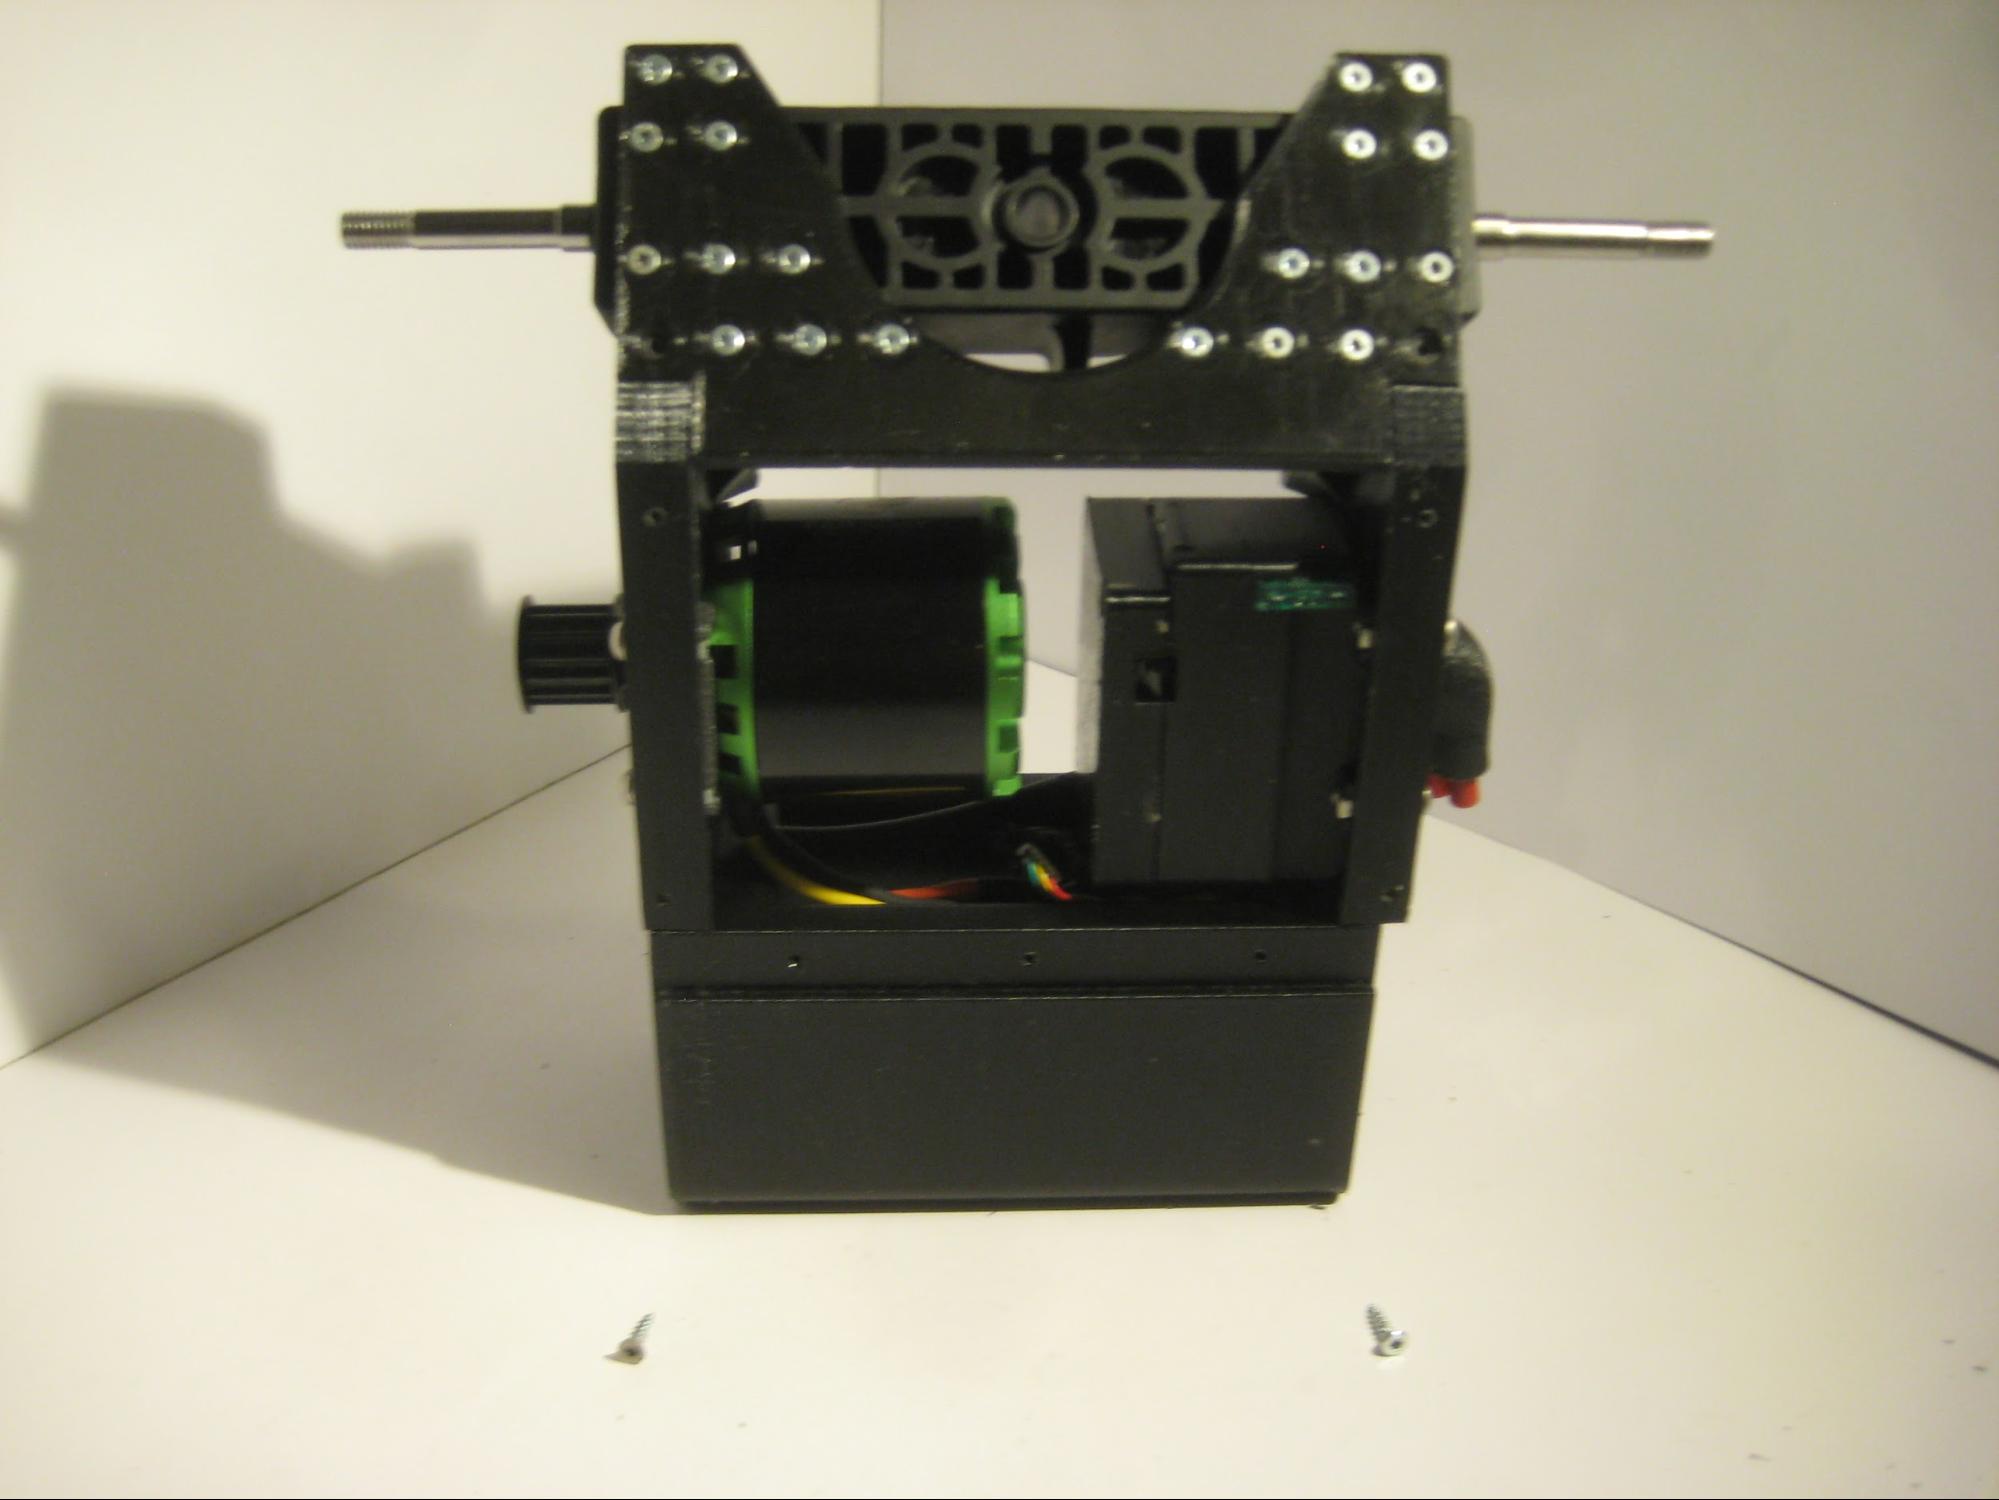
Picture 2.3
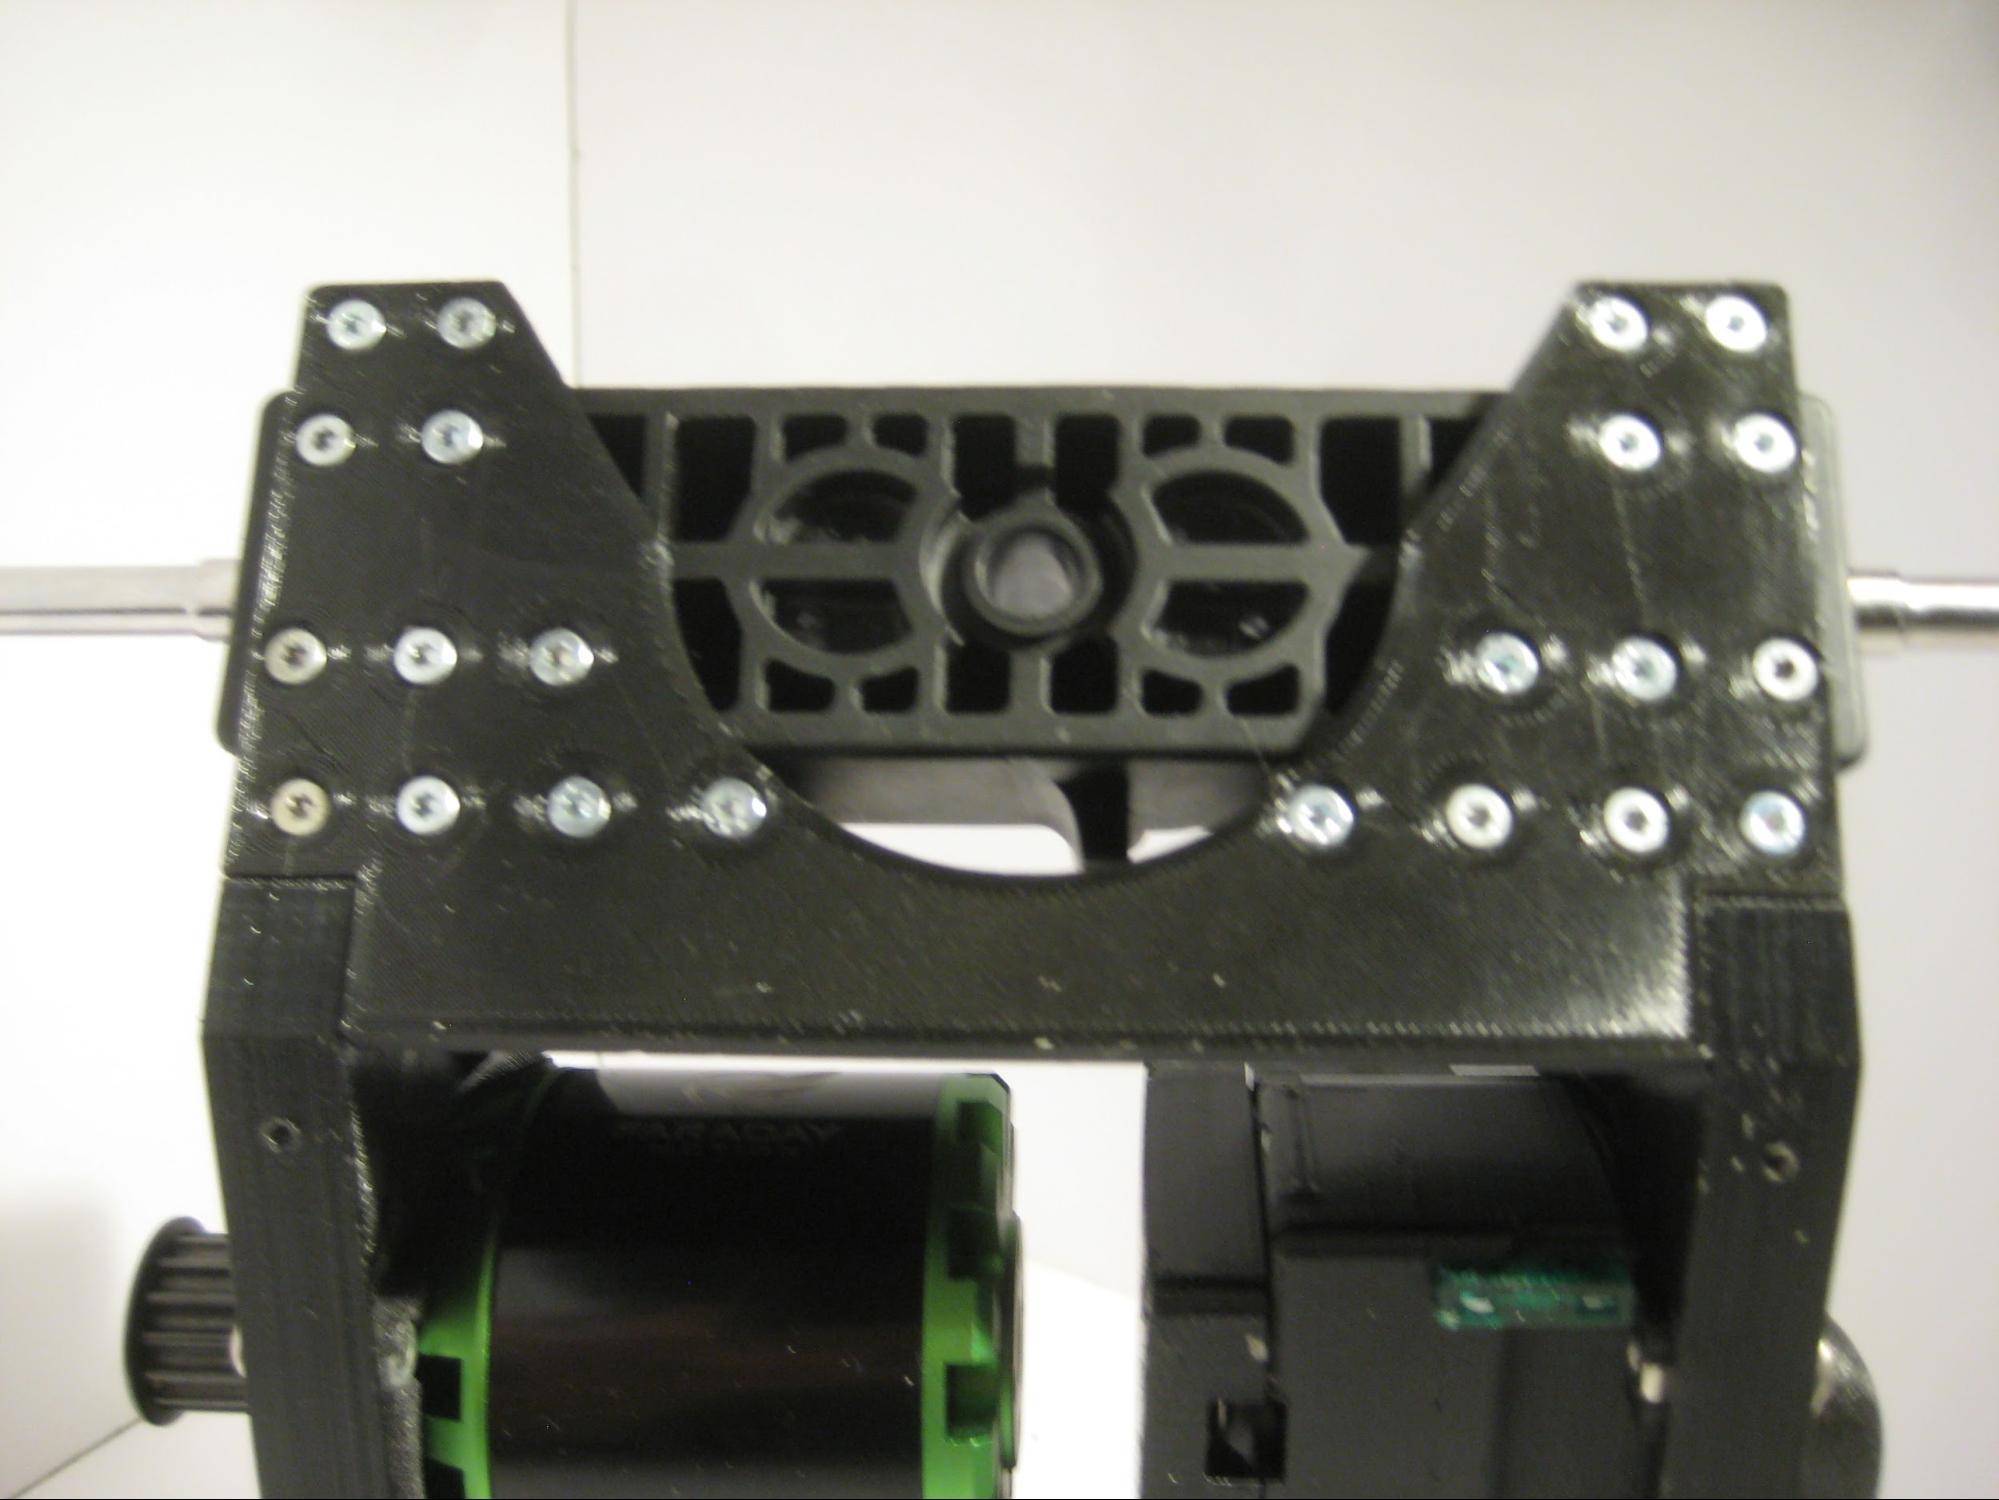
Picture 2.4
Pictures 2.3 & 2.4 show how to use 2 XS screws in order to initially fixate the 2 parts.
Step 3 - Screw all parts together
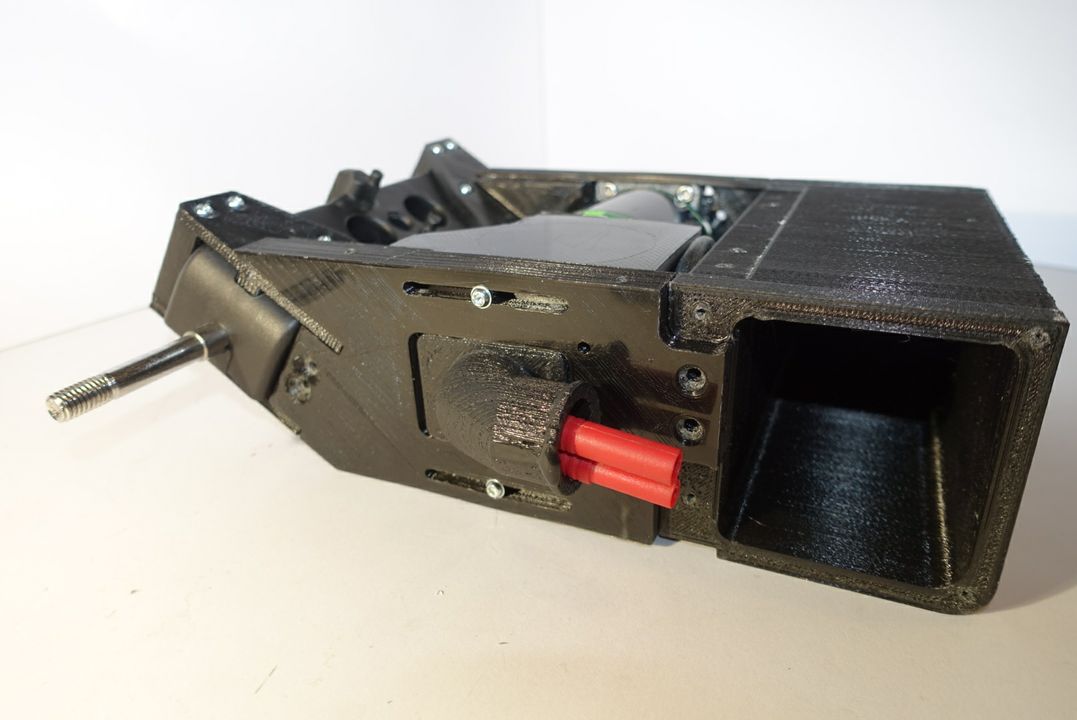
Picture 3.1
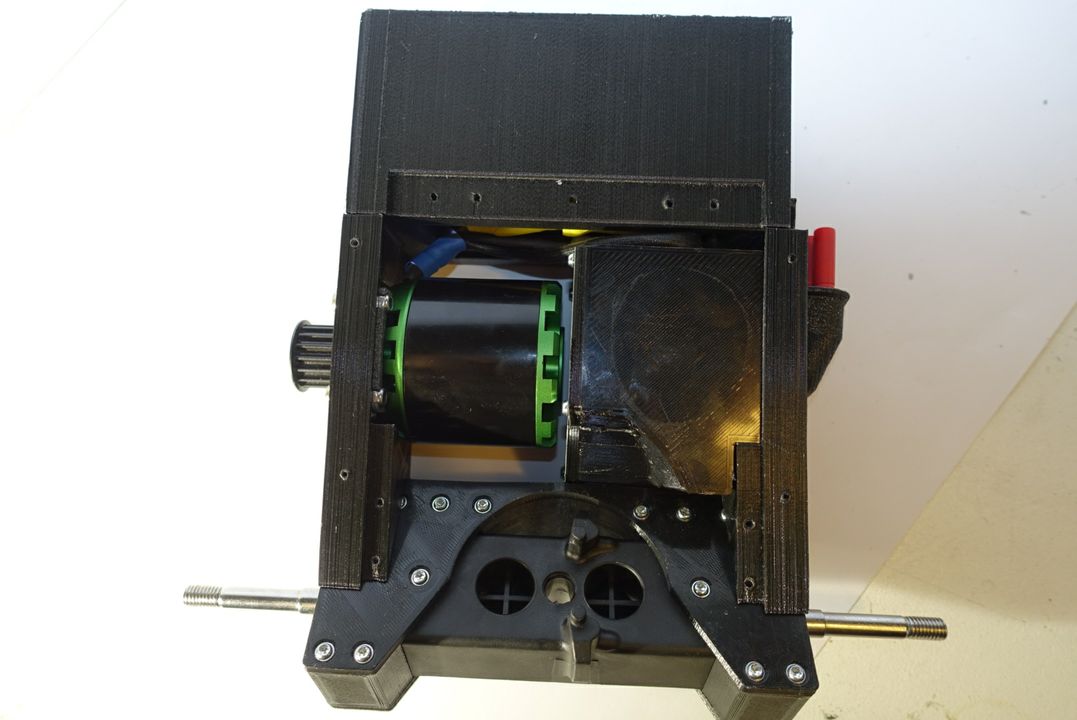
Picture 3.2
Picture 3.3
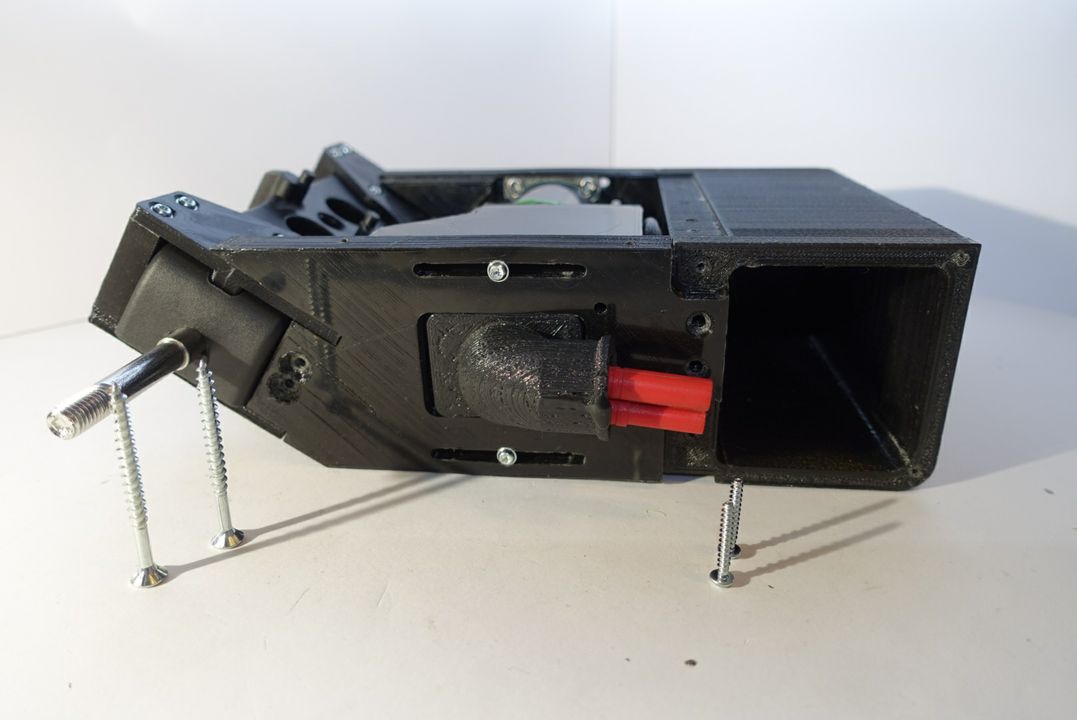
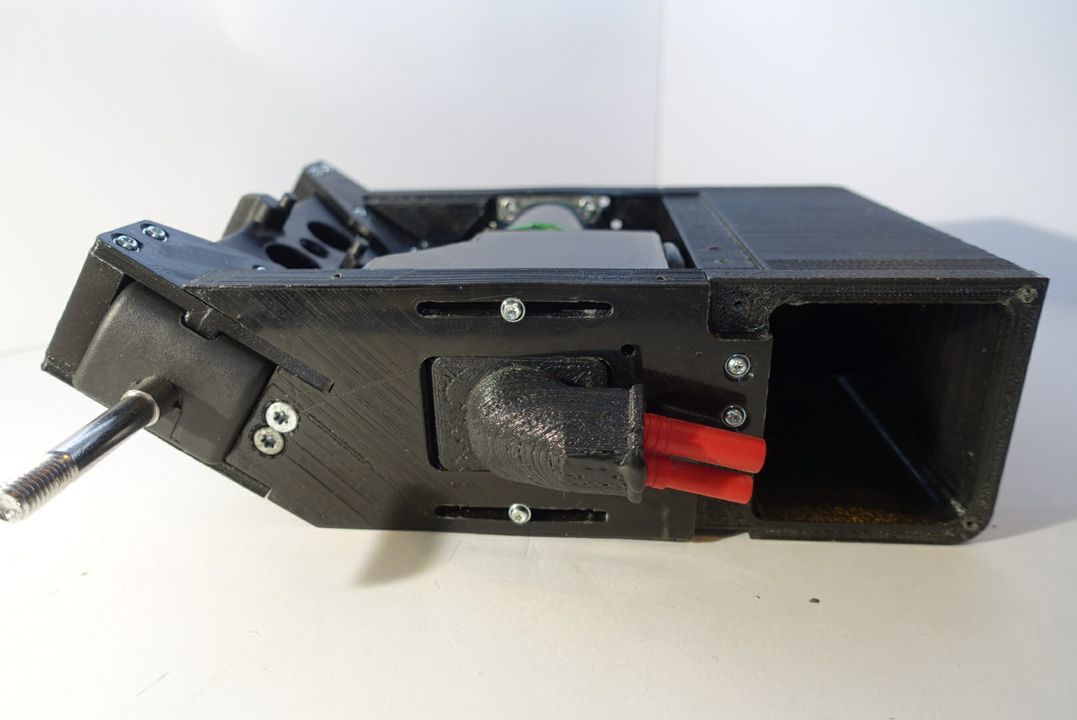
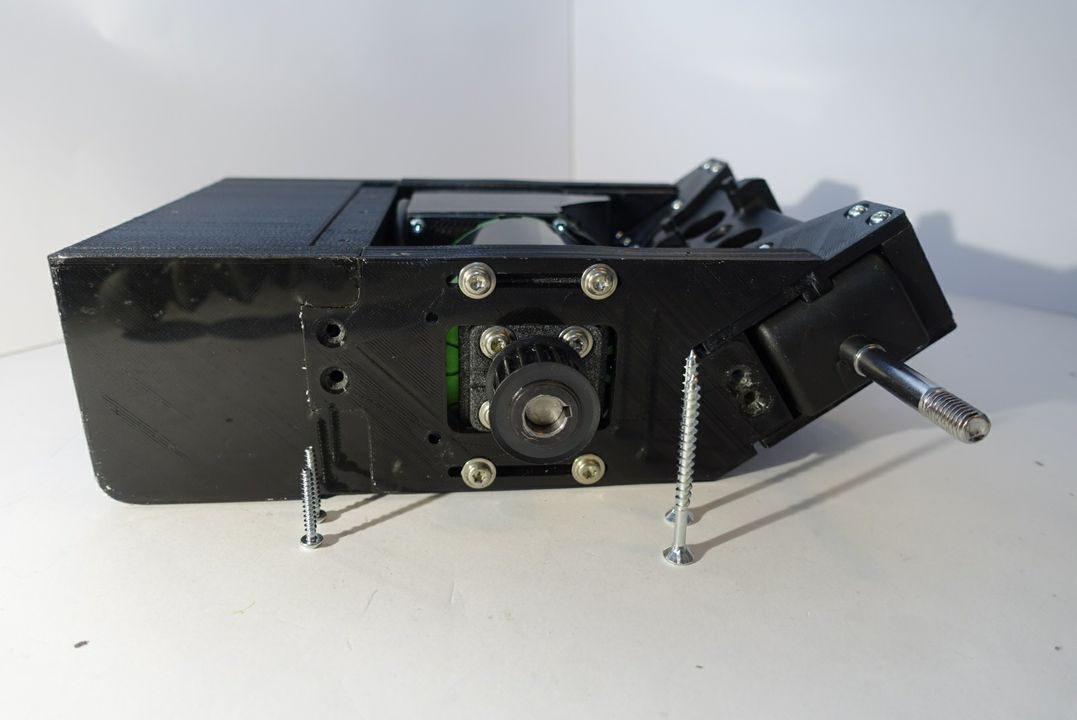
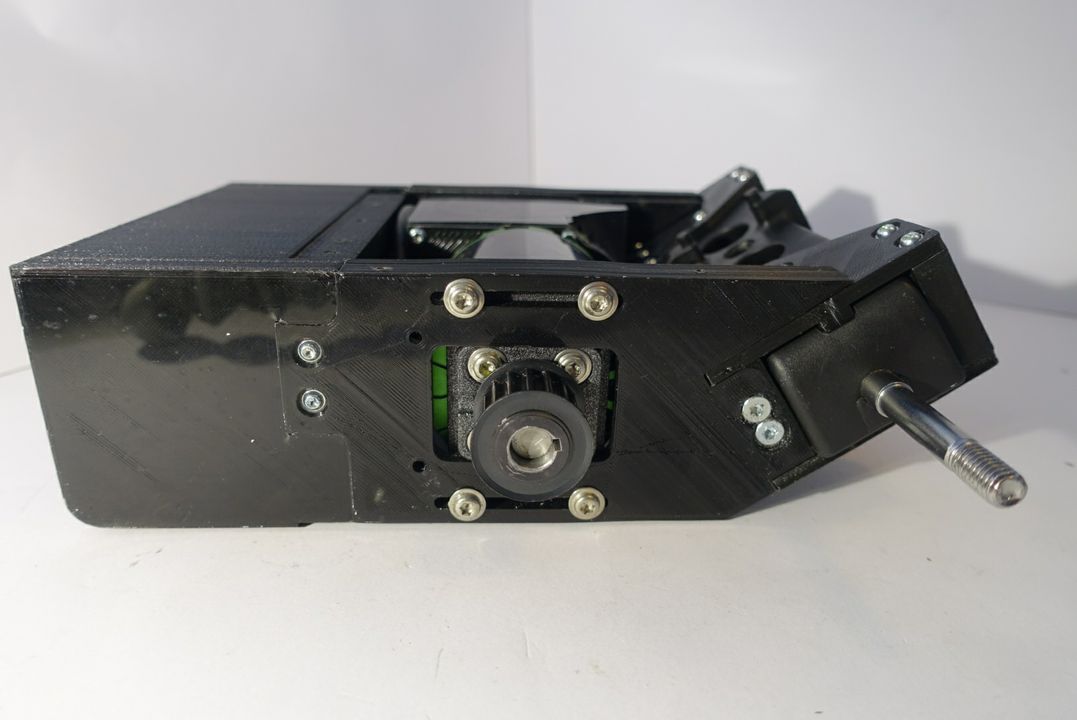
In order to have a strong and secure connection between the two parts (axle and battery box) you have to screw in 2 XL screws & 2 SM screws on each side of the construction as shown through pictures 3.3 - 3.6.
Picture 3.4
Picture 3.5
Picture 3.6
Step 4 - Enclosing the Spine Box
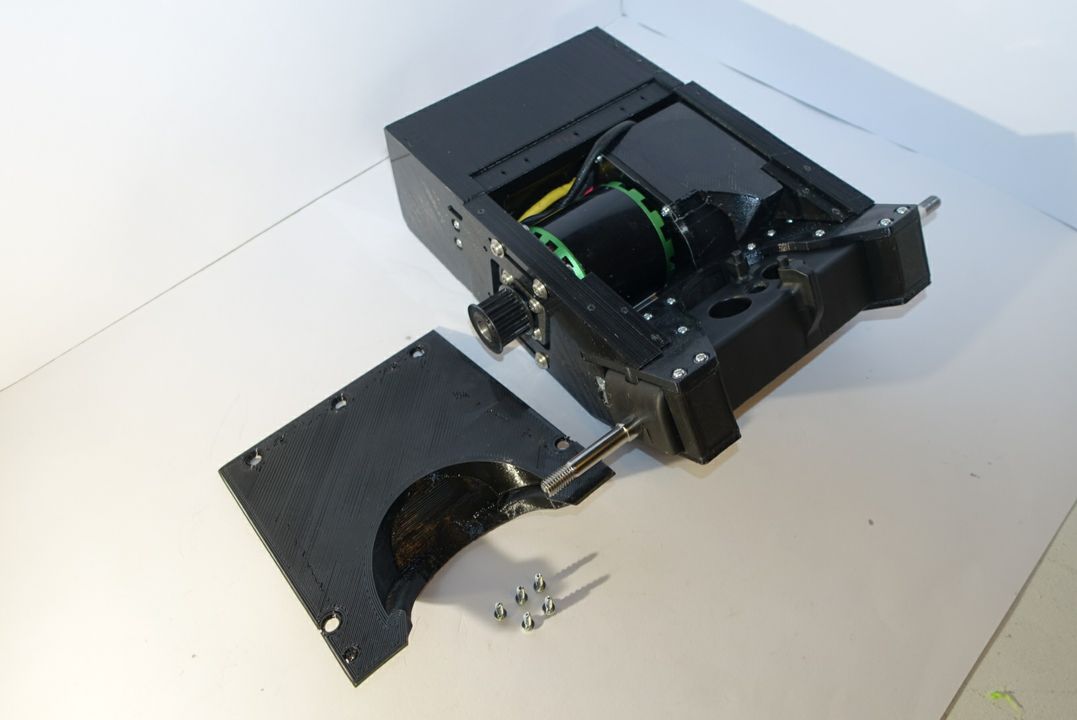
Picture 4.1
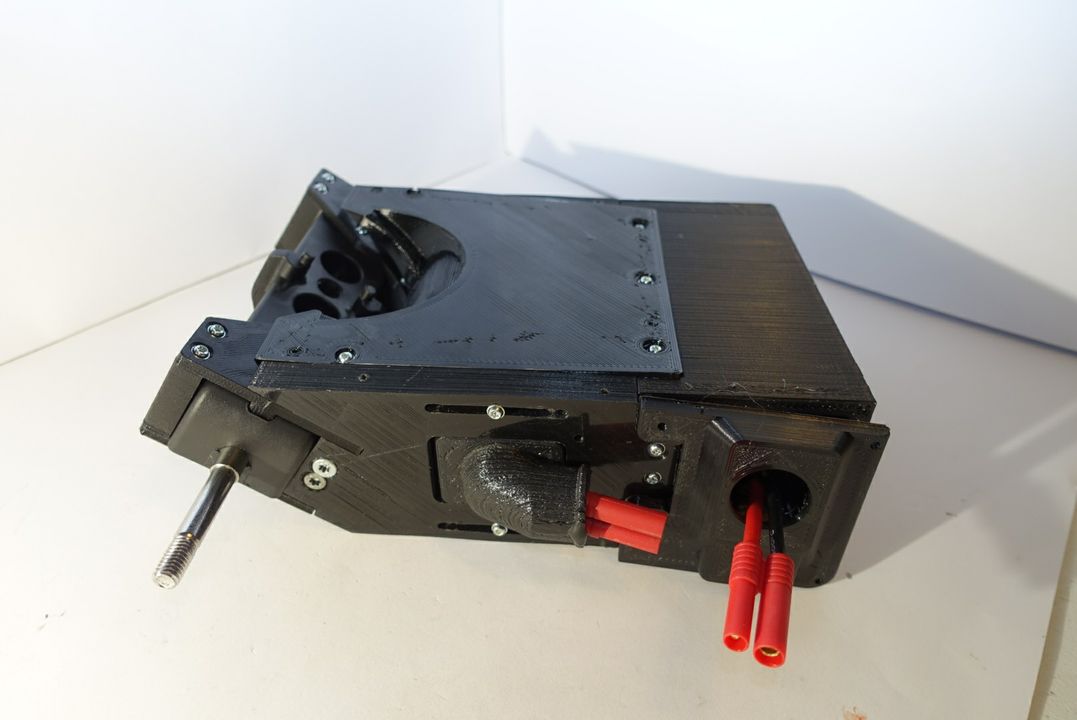
Picture 4.2
Prepare the inner top lid and 5 XS screws. Mount the lid as shown in pictures 4.1 - 4.2.
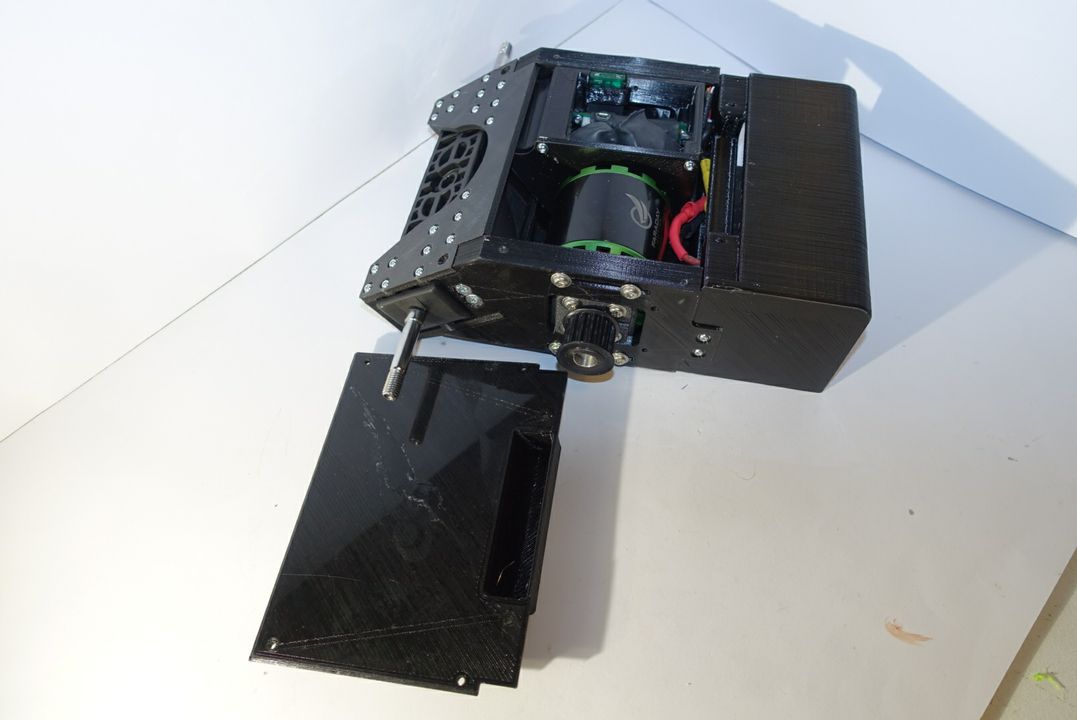
Picture 4.3
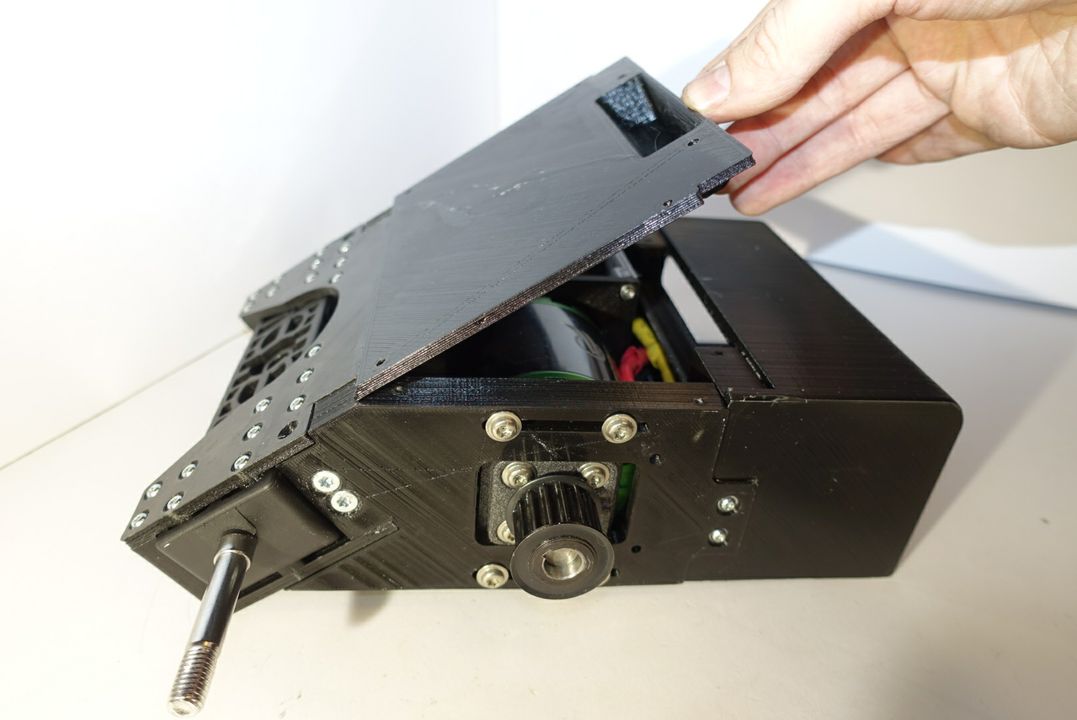
Picture 4.4
As show in picture 4.3 - 4.4 slide in one of the edges of the inner bottom lid onto the Spine box. Then push it down so that it looks just like it looks in picture 4.5.
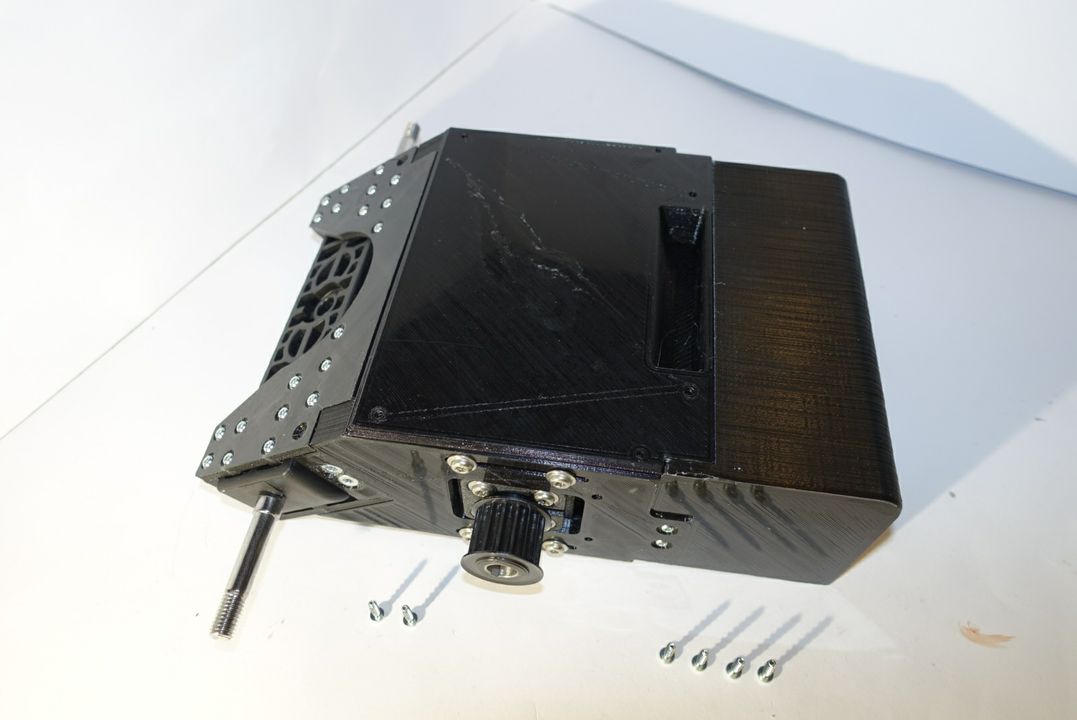
Picture 4.5
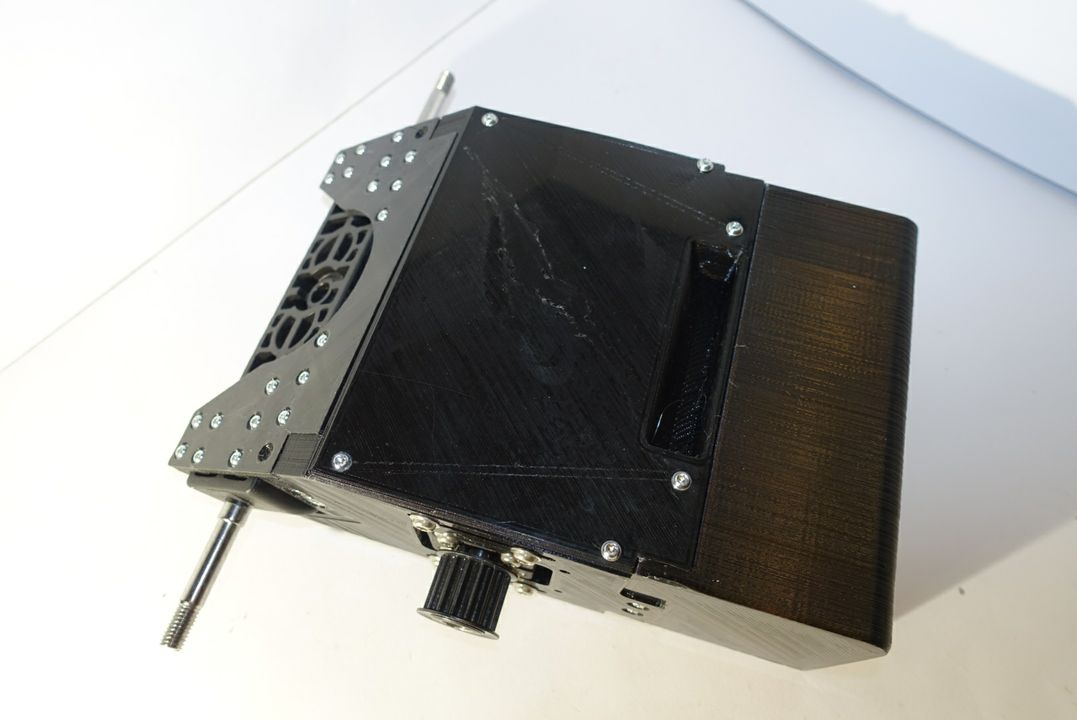
Picture 4.6
Now mount the inner bottom lid as shown in pictures 4.5 - 4.6 using 6 XS screws.
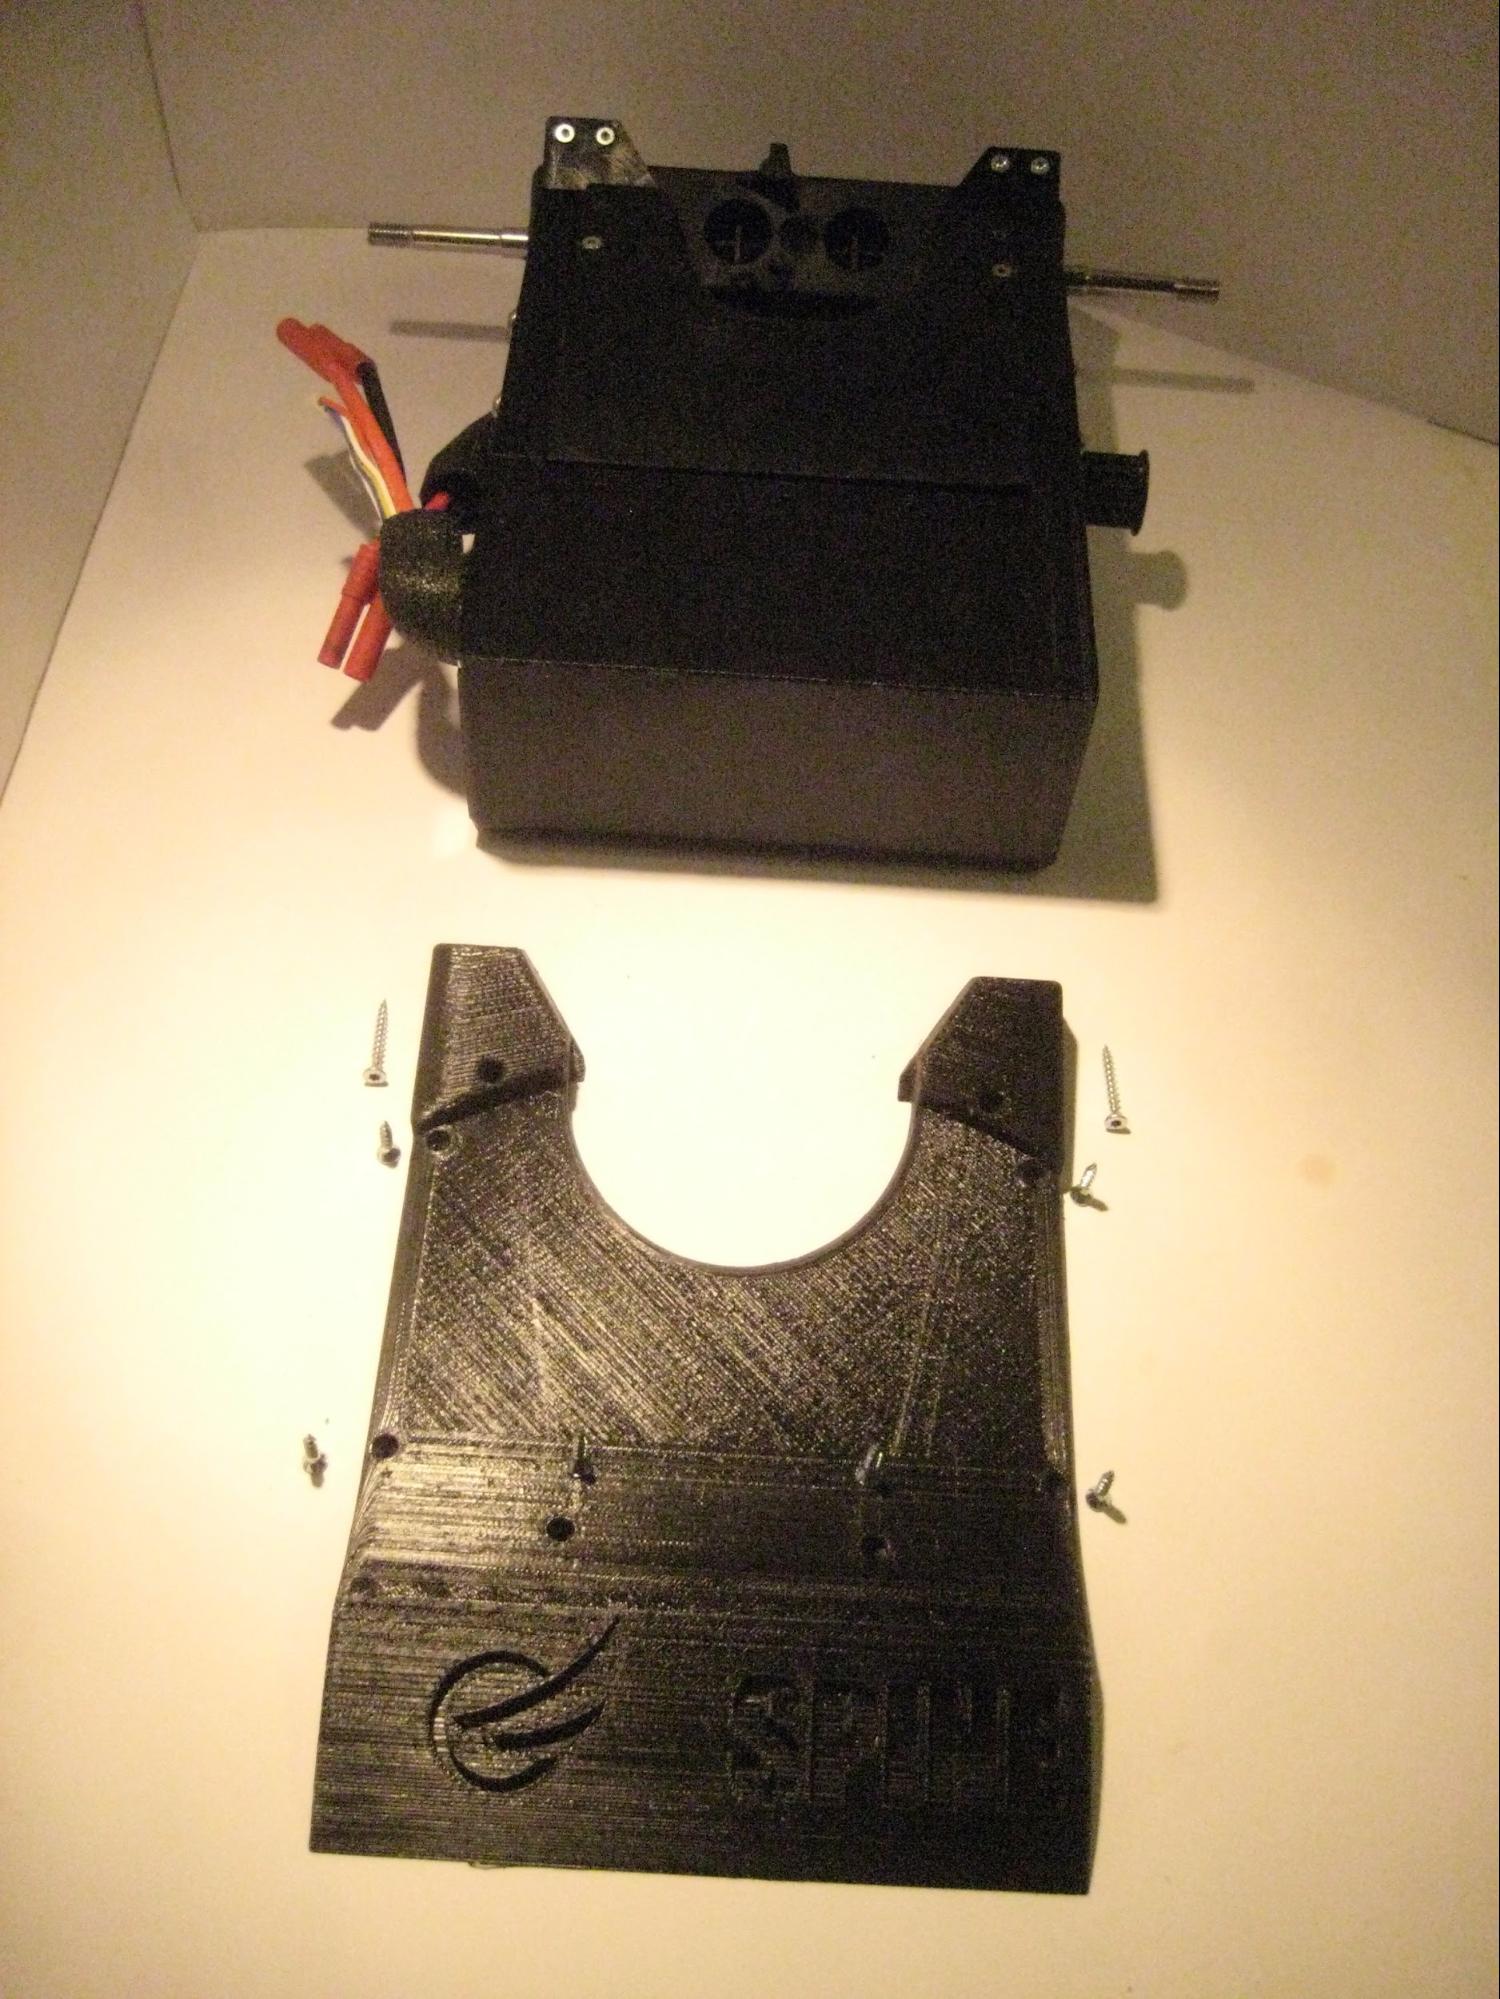
Picture 4.7
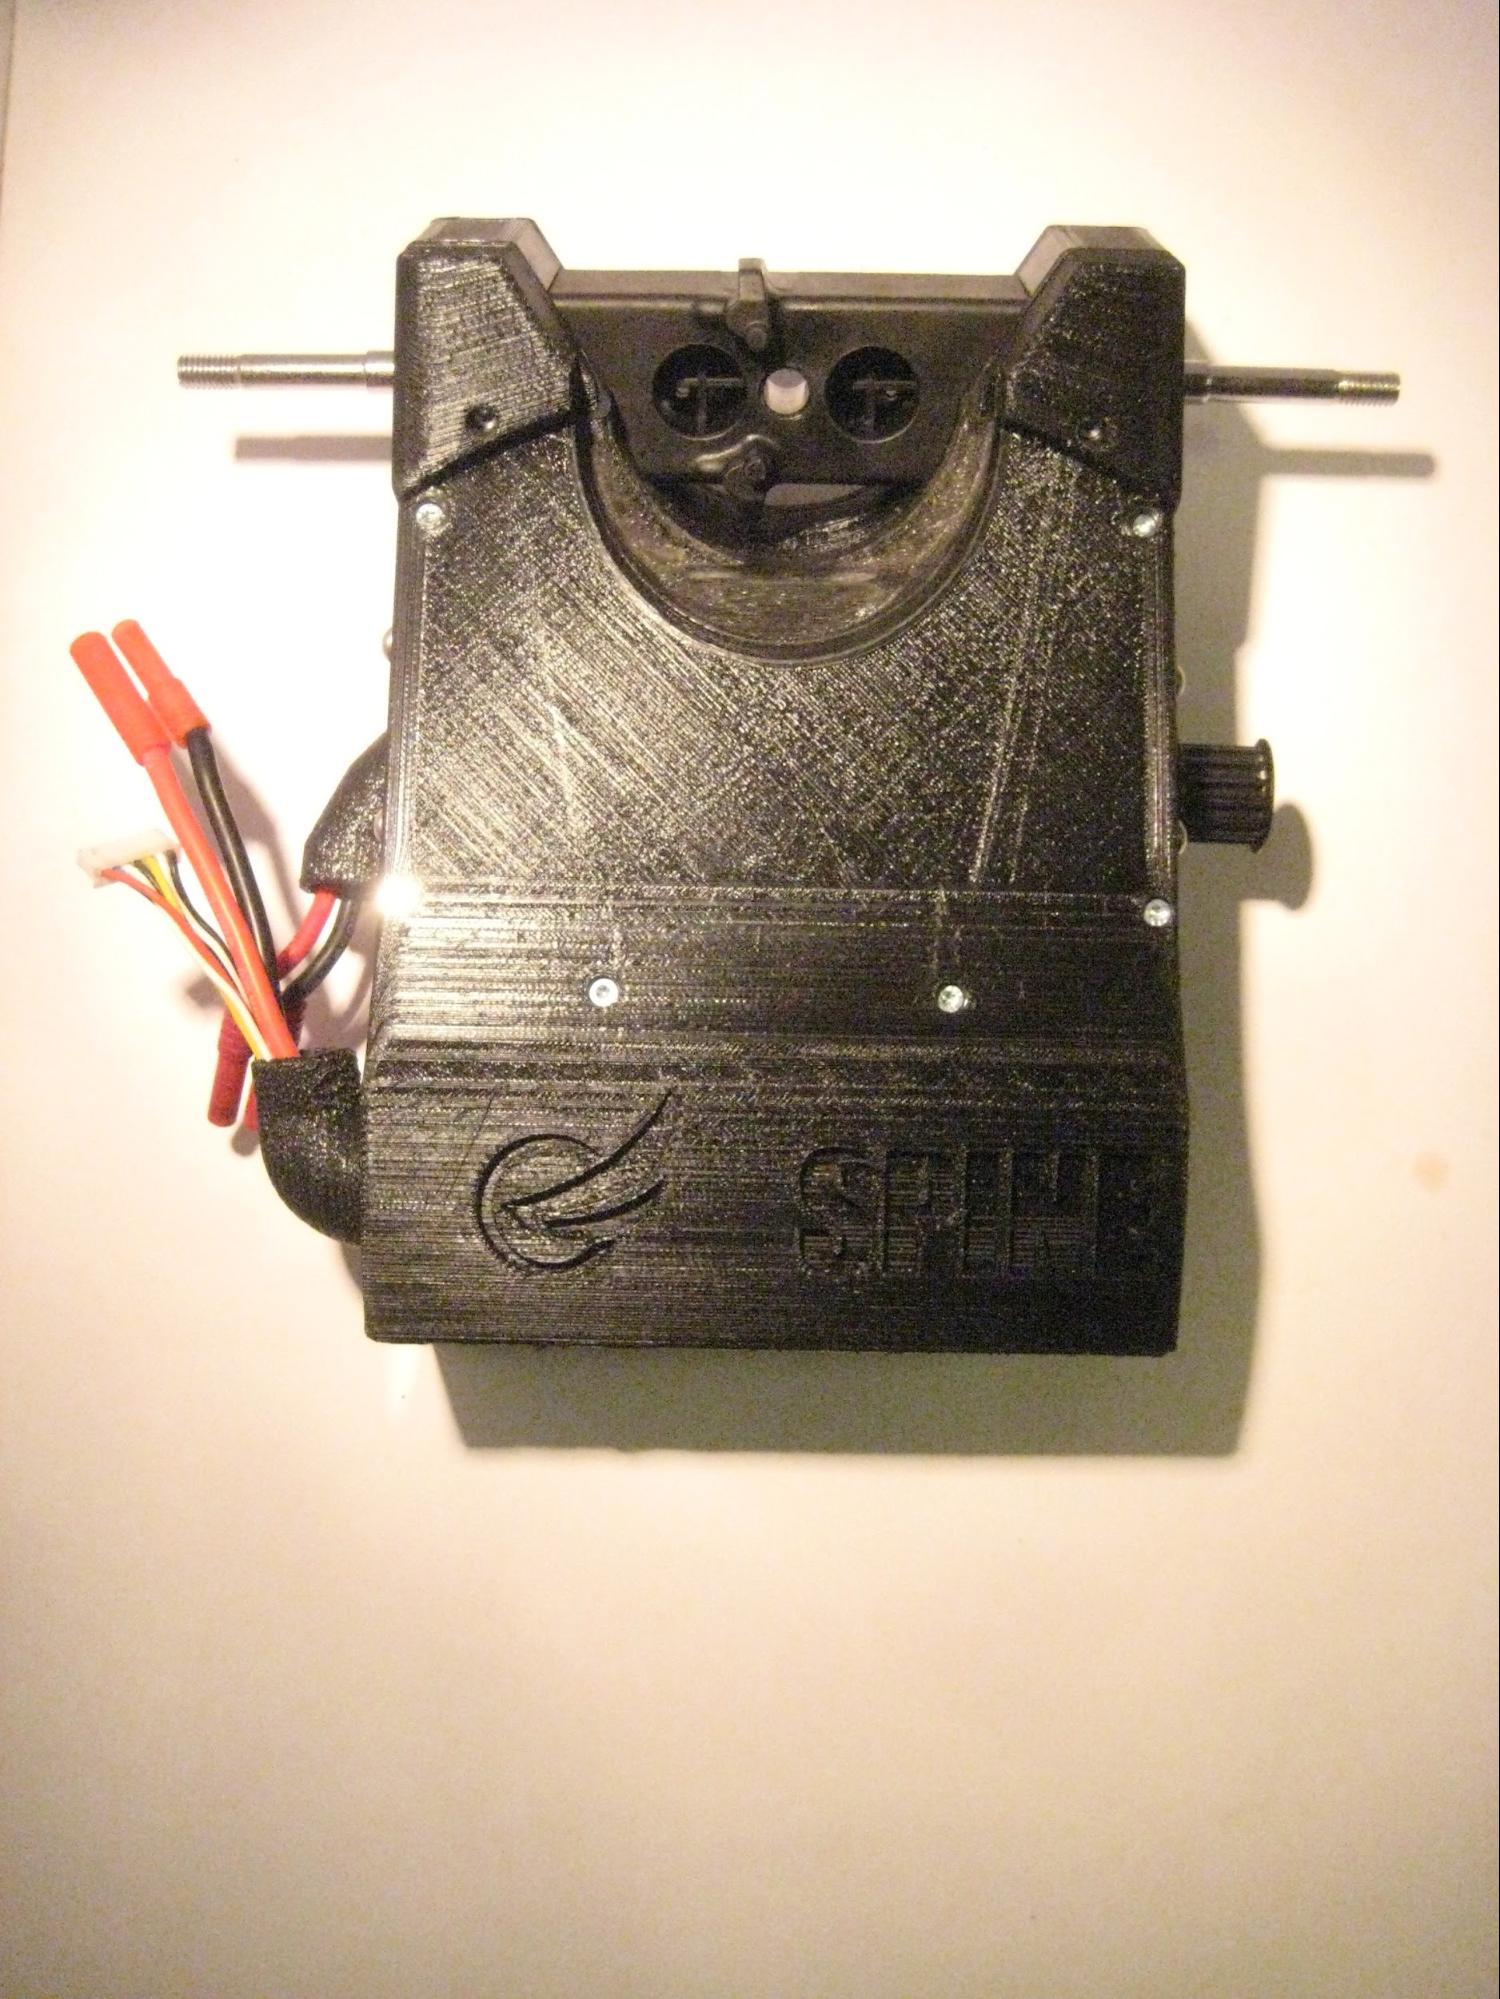
Picture 4.8
Use 2 SM screws and 6 XS screws to mount the top cover of the spine box (pictures 4.7 - 4.8).
Congrats! You have finished assembling the Spine box.
Updated less than a minute ago
